
Dawid Batog

A blog/portfolio documenting each unit of my work
Year 1 Final Major - The bigger they are, the harder they fall.
Section 1: Review (Approx 150 words)
Explain the journey you have gone through in this past academic year. What were the greatest milestones of your learning? How do you feel you have developed as an artist? Explain how you have decided on your specialism – was it a turning point in a specific project? Have you always identified as a specific type of artist? If so, how have you developed and furthered your skills to get to this point? Explain how your journey has ended up here, with this idea, for this final major project.
I believe that this year has been very beneficial towards my learning. I’ve learned many new programs such as Mudbox, Photoshop, Flash, Maya and Unity. I strongly believe that Unit 4 was the turning point in my learning. I’ve realised that modelling the environment was the most fun I’ve had from creating work and that it was something I definitely want to do in the future. I think my greatest milestone was creating a tank model without any input from my teacher as I’ve attempted to make it as detailed as I can to push myself to get better. For my final major project I want to approach from a non-organic angle and attempt to create a Mad-Max inspired vehicle.
Section 2: Project Concept & Proposed Artist Statement (Approx 300 words)
This is where you explain your FMP project idea and concept. Be specific about what you intend to communicate and what you hope to achieve by producing this work. How will your work engage or affect your audience and what will they discover by interacting with or viewing your work? Describe the theme/concept of your work – is it based on fact or fiction? Are you creating or reacting to a mood, an emotion, a sense of atmosphere or sensation? What is the title of your Project? What will you work towards producing? What will be your final outcome?
For my final major I want to model a vehicle inspired by the franchise ‘’Mad Max’’ and the video game series ‘’Twisted Metal”. The vehicle would be modelled to the highest detail I can achieve using textures found both online and photographed by me. I then plan to visualize to model using an image plane of a parking lot and inserting the model into one of the spots. The scene will have average cars all around with my model in between. I plan to then use Photoshop to enhance the realism of my image and make it more believable.
I believe that overall this model will show off the skills that I’ve developed throughout the year and showcase my capability to work on a larger scale in terms of time and quality.
Section 3: Methods (Approx 150 words)
Refer to any techniques and processes you intend to use. Describe the range of media and materials relevant to your project and how you may use them to explore and develop your ideas. Include aspects of studio practice, workshop procedures or the use of particular equipment and software etc. In the timetable, provide an indicative timescale for your project and indicate the manner in which you intend to divide your time in order to investigate, develop, produce and evaluate your project appropriately. This should be a meaningful plan to you and should be personalised to your project.
I plan to use software created by the company Autodesk called ‘’Maya’’. This software will allow me to create a detailed model of a vehicle based on research from different media such as movies or video games. I plan on creating the model to a high degree of quality including using a UV mapping of photographic textures (both from the internet and photographed by me) to add realism to my model. To make it more believable I must add effects that will add ‘camera flaws’ to the image. One of the most popular ‘camera flaws’ is the fact that it cannot focus on everything in the image at once. By using Gaussian Blur in Photoshop I will be able to replicate that same effect.
Section 4: Evaluation (Approx 150 words)
How will you critically review and analyse your work and determine if it is successful? How will you identify directions for ongoing development? Do you have a method to record the critical response to your ideas? How do you propose to assess the success of your Final Major Project and what will be your methods of evaluation?
I will record my process notes on my portfolio including a screenshot of each step. This will allow me to show my work to anyone who visits my portfolio. I will ask the reader for their opinion and how the current work could be improved and I will record the feedback in written form. I will then learn from the feedback and attempt to make my work better to achieve a higher quality.
Proposed Research Sources and Bibliography (Harvard Format)
What are the influences, starting points and contextual references and why are they relevant to your ideas? Indicate the subject areas you intend to research and the likely sources of information including any museums, specific locations, performances, etc. you plan to visit. You should explain the value of this research and then compile an accurate bibliography correctly acknowledging all references including texts, periodicals, websites and video/DVD’s etc.
“Mad Max” (Franchise)
“Mad Max” (1979)
“Mad Max 2: The Road Warrior” (1981)
“Mad Max Beyond Thunderdome” (1985)
“Mad Max: Fury Road” (2015)
“Mad Max” (2015) [Video Game]
The story (set in a post-apocalyptic Australian setting where civilisation collapsed due to shortages of resources) follows a man who has lost everything he cared about. The atmosphere of the world is very barbaric and several ‘gangs’ have set up control of different regions. The main action in the franchise comes from the vehicular combat that occurs when the members of the gangs fight for territory. The vehicles that are present in the franchise are very unique and have specific post-apocalyptic features including rusting metal and primitive weaponry.
“Twisted Metal” (Video Game Franchise)
“Twisted Metal” (1995)
“Twisted Metal 2” (1996)
“Twisted Metal III” (1998)
“Twisted Metal 4” (1999)
“Twisted Metal: Black” (2001)
“Twisted Metal: Head-On” (2005)
"Twisted Metal” (2012)
The twisted metal video games focus on a demolition derby arena where the use of any weapon imaginable is permitted. This resulted in many unique vehicles being created all with the purpose of dealing damage to other vehicles. The franchise has an overarching story where the winner of the derby gets one wish granted to them, no matter what it is.
I plan on sourcing my textures from CGTextures (2005) and FreeStockTextures (2009) but I also plan on personally taking some photographs and using them as textures.
Reference List:
Mad Max (1979), Directed By George Miller, Australia
Mad Max 2: The Road Warrior (1981), Directed By George Miller, Australia
Mad Max Beyond Thunderdome (1985) Directed By George Miller and George Ogilvie, Australia
Mad Max: Fury Road (2015), Directed by George Miller, Australia
Mad Max (2015), Avalanche Studios, Video Game, [PC, Xbox One and PlayStation 4], Sweden
Twisted Metal (1995), SingleTrac, Video Game, [PlayStation and PC], Utah, USA
Twisted Metal 2 (1996), SingleTrac, Video Game, [PlatStation and PC], Utah, USA
Twisted Metal III (1998), 989 Studios, Video Game, Play Station, Los Angeles, USA
Twisted Metal 4 (1999), 989 Studios, Video Game, Play Station, Los Angeles, USA
Twisted Metal: Black (2001), Incognito Entertainment, Video Game, Playstation 2, Utah, USA
Twisted Metal: Head-On (2005), Incognito Entertainment, Video Game, PlayStation Portable, Utah, USA
Twisted Metal (2012), Eat Sleep Play, Video Game, PlayStation 3, Utah, USA
CGTextures aka.Textures.com (2005), Marcel Vijfwinkel’s website: a website that offers digital pictures of all sorts of materials: Available at: http://textures.com (Accessed on: 9 March 2016)
FreeStockTextures (2009), [Paul Wozniak and Eva Sajdak]: A gallery of amateur images of all sorts of materials: Available at: http://freestocktextures.com (Accessed on: 9 March 2016).


To begin I want to research the different styles of vehicles present in both franchises.


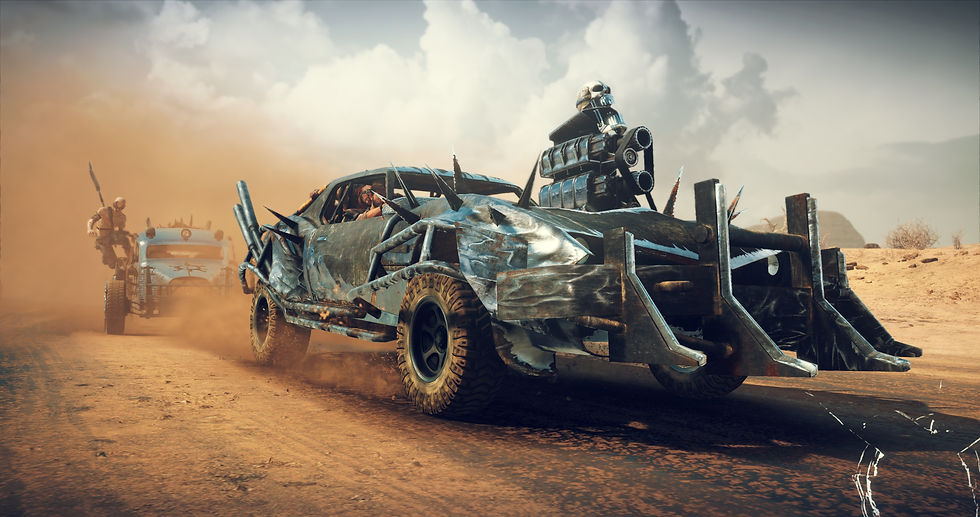


It is clearly visible that the vehicles in Mad Max take on a bigger form from the original vehicle they were based on. Wether its extra armour to add bulk or extra weaponry one thing is clear, the vehicles in mad max are made to look intimidating and rightly so seeing that the series revolves around the vehicles representing the individual driving them. All of these vehicles were created with combat in mind meaning that they all have a specific theme that makes them good for fighting. In order to create a model that stays true to the Mad Max franchise I will have to figure out a theme for my own vehicle and apply it keeping in mind that the vehicle has to be combat ready. All of the vehicles share the same 'dirty' and rusty look to them this is because the setting that they are in was kept in mind when first designing the vehicles and I want my vehicle to be reminiscent of a Mad Max vehicle I will have to consider using textures with more worn out materials.


Immediately it is visible that the theme and artstyle of these vehicles varies greatly to the aesthetic of the Mad Max line of vehicles. The Twisted Metal vehicles have a more cheery colour scheme even though the vehicles are still as dangerous, if not more, than the Mad Max vehicles. Most of the Twisted Metal vehicles share a common weapon which is the 'Minigun'. Almost every vehicle shown in these images has one or two mounted onto it meaning that if I want my model to be reminiscent of a Twisted Metal vehicle I should look into modelling a minigun and inserting it onto the vehicle. Some damage is visible on the vehicles but it is nowhere close to the rust and damage that is shown in the Mad Max vehicles. Another thing I will have to take inspiration from are the bright colours, they stand out and stand for what makes the Twisted Metal vehicles unique.

To visualize my draft within the mad max universe I've decided to cut bits and pieces of different vehicles and machinery and stick them together, similarly to how vehicles are done withing the mad max universe. Although it is not the best looking photoshop edit, I still believe it portrays what I want my vehicle to resemble. I've particularly focused on the larger truck-like vehicles present in the source images due to their large size.
Image sources:
Mad Max:
http://blog.caranddriver.com/wp-content/uploads/2015/04/MMFR_PlymouthRock-876x534.jpg
http://cdn.wccftech.com/wp-content/uploads/2015/04/Mad-Max-6.jpg
http://cenapop.virgula.uol.com.br/wordpress/wp-content/uploads/2015/05/madmax_roadfury_cars_04.jpg
http://proctorcars.wpengine.netdna-cdn.com/wp-content/uploads/2015/08/peacemaker.jpg
http://blog.caranddriver.com/wp-content/uploads/2015/04/MMFR_BigFoot-876x534.jpg
https://photos-0.carwow.co.uk/blog/1600/BASHQAIwatermarked.jpg
http://cenapop.virgula.uol.com.br/wordpress/wp-content/uploads/2015/05/madmax_roadfury_cars_04.jpg
http://motortorque.org/wp-content/uploads/2015/05/mad-max-fury-road-vehicle-featurette.png
http://img.deusm.com/designnews/2015/05/277622/MadMax_Interceptor.jpg
http://static4.gamespot.com/uploads/original/1544/15443861/2850949-mad_max_screens_5.jpg
http://www.cinemablend.com/images/gallery/s71436/mad_max_14296535583987.jpg
Twisted Metal:
https://barroomgamer.files.wordpress.com/2013/05/twister.jpg
https://i.ytimg.com/vi/Xdzke36hwM8/maxresdefault.jpg
https://i.ytimg.com/vi/85aOxdcZIRw/maxresdefault.jpg
https://i.ytimg.com/vi/zcILMvQkk9Y/maxresdefault.jpg
https://i.ytimg.com/vi/g4Ff31UT7xk/maxresdefault.jpg
https://emotionalmultimediaride.files.wordpress.com/2014/05/twistedmetal_3.jpg
http://img04.deviantart.net/1434/i/2013/316/6/9/twisted_metal___sweet_tooth_by_rogusto-d6u246c.jpg
http://3.bp.blogspot.com/-TtLlazObGUo/Thsd1DkDm-I/AAAAAAAAAFw/XHOQIl09RnI/s1600/Twisted-Metal2.jpg
http://tmximgsvc_prod.s3.amazonaws.com/8a39e62b42e2a191a5c84b2aecc009d68dda3040.jpg
Week 1 - Baby Steps

At first I wanted to envision a vehicle of the modern day but damaged in the style of mad max. I chose to use a Chevrolet Silverado as my base for the vehicle. I began modelling the front bumper of the vehicle by manipulating a simple cube and extruding it to give it extra detail that will increase the realism of the bumper. It quickly became apparent to me that I will not be able to sucesfully model a modern vehicle without messing up the modelling as it is already extremely difficult to create a perfect replica and so I went back to the drawing board in order to create a more realistic target for myself.
I thought out a new idea which would include me creating a vehicle made from different parts of metal stuck together, in spirit of how the vehicles in mad max are created. I began by creating a photoshop mock-up of what wanted the vehicle to look like by taking different mechanical parts from google images and then layering them on top of each other. I enjoyed this idea much more and began to model the basic shapes of the vehicle by using the 'create polygon' tools combined with extrude. I also used the smooth feature as my project would be entirely maya-based.
 Screen Shot 2016-03-15 at 11.54.03 |  Screen Shot 2016-03-15 at 12.00.05 |  Screen Shot 2016-03-15 at 12.13.19 |
|---|---|---|
 Screen Shot 2016-03-15 at 12.19.30 |
 Screen Shot 2016-03-16 at 09.17.41 |  Screen Shot 2016-03-16 at 09.20.04 |  Screen Shot 2016-03-16 at 09.42.28 |
|---|---|---|
 Screen Shot 2016-03-16 at 11.27.31 |
 Screen Shot 2016-03-21 at 09.43.34 |  Screen Shot 2016-03-21 at 10.28.20 |  Screen Shot 2016-03-21 at 10.28.25 |
|---|
Week 2 - Spinning into motion

I began working on the wheels of the vehicle. I used one of the polygon tools to create a basic wheel shape. I then created a maya_material_x with a preset of rubber to make the wheel more realistic. I then started to create the rows of spikes that would cover the wheel. I textured the spikes and small detail with an mmx texture with a preset of satined metal to give it a realistic look. I then textured the spikes with a rusty texture as the mad max universe is mostly made up of rusty metal.
I textured the outside of the wheel with a bump-mapped texture of a tire but because it is an mmx texture it will not show the bump-mapping unless rendered.

 Screen Shot 2016-03-21 at 10.50.32 |  Screen Shot 2016-03-21 at 10.56.01 |  Screen Shot 2016-03-21 at 11.12.17 |
|---|---|---|
 Screen Shot 2016-03-21 at 12.06.24 |
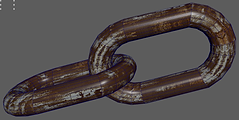
I wanted to create a chain to connect the different pieces of the car together. I began by making a simple oval shape by using a combination of the extrude tool and the bridge tool. I then duplicated the ring several times and connected the two pieces together. To give it a more realistic look I've used the move tool on the middle vertices of the chain and dragged it down to give the chain more 'sag'. This would make it look mre realistic and well-made. After completing the chains I've realised that they do not look very realistic as they are too square and flat on the sides. I've planned to fix this in the future but I will leave it as it is for now.


 Screen Shot 2016-03-21 at 13.31.45 |  Screen Shot 2016-03-21 at 13.40.51 |  Screen Shot 2016-03-21 at 13.45.40 |
|---|

This is the first render of my vehicle. As you can see this is a heavy work in progress however I believe that it is slowly taking shape to look like the design that I've created in photoshop. When rendering I've spotted the fact that the frontal body has an error in the faces making a thin line stand out. I've also realised that the chains are too flat to look like actual chains and so I decided to remake them in the future. The back part of the vehicle doesn't really fit in at the moment but I believe that in the future it will turn out to work well within the composition.
Week 3 - Grills 'n' Chains

I created a grill that would be placed at the front of the car. This would give the car a more rough and western looking aesthetic. I created the cylinders by using the cylinder polygoon tool and extruding the upper faces outwards so that a 90 degree angle is achieved. I then textured the grill using a mmx texture with a default of satined metal and an image of rusty metal with a bump-map.

 Screen Shot 2016-03-21 at 15.08.13 |  Screen Shot 2016-03-21 at 15.07.09 |  Screen Shot 2016-03-21 at 14.34.12 |
|---|
I decided to create a better chain by using one of the polygon tools and creating a ring shape. I then selected half of the faces in the ring shape and used the move tool to create a more oval-like shape. I then used one of the textures that I've used when making the grill and applied it to the chain.
I overlapped the chain to create a chain-link and then duplicated the chain several times whilst mixing in rotation in-between in order to simulate the chain sagging from its weight. I then replaced all of the previous chain links with the new chain and attached it to the different vehicle parts.

 Screen Shot 2016-03-22 at 09.43.25 |  Screen Shot 2016-03-22 at 09.45.24 |  Screen Shot 2016-03-22 at 09.48.21 |
|---|
 Screen Shot 2016-03-22 at 09.56.11 |  Screen Shot 2016-03-22 at 09.57.36 |  Screen Shot 2016-03-22 at 12.01.59 |
|---|
 Screen Shot 2016-03-22 at 12.06.13 |  Screen Shot 2016-03-23 at 09.12.48 |  Screen Shot 2016-03-23 at 09.15.52 |
|---|
Week 4 - Rust, Rust Everywhere

I've decided to model a front bumper to my truck as I believe it would give it a more 'violent' look that would be needed in a world where vehicles are used to fight each other.
I began by modelling a simple triangle shape and then manipulating its polygons using extrude and the move tool combined with soft select.
I've also modelled small bars that would be there to give the bumper some extra support and to look menacing. I've made the ends of the bars jagged by manipulating their vertices.
Finally I've textured both the bumper and the bars with maya_x_material textures to make them look more metallic and rusted.
 Screen Shot 2016-03-23 at 09.24.56 |  Screen Shot 2016-03-23 at 09.26.50 |  Screen Shot 2016-03-23 at 09.30.00 |
|---|---|---|
 Screen Shot 2016-03-23 at 09.33.24 |
 Screen Shot 2016-03-23 at 09.43.04 |  Screen Shot 2016-03-23 at 09.46.28 |  Screen Shot 2016-03-23 at 09.51.21 |
|---|
 Screen Shot 2016-03-23 at 10.13.29 |  Screen Shot 2016-03-23 at 10.29.59 |
|---|
I wanted to model exhaust pipes that would be on the top of the truck near the driver. I began by making 3 simple cylinders, two that bent to a 90 degree angle and one that was sightly bigger than the other two but didnt bend at all. I then connected the shapes and began to create small cylinders on the main shape. These cylinders would be used to create holes on the body of the exhaust pipes. It took a while to duplicate all of the cylinders but after I was done I've used booleans to create a cylinder with many holes within it similar to the exhaust pipes I've used in my photoshop mock-up. Finally I've textured the exhaust pipe using a maya_x_material of rusty metal and placed it onto the truck. I've created 4 copies of it to occupy the empty space on the top of the truck. Below is a render of my progress so far. The exhaust pipes definitely make the truck look more menacing and it almost resembles a bull.

 Screen Shot 2016-03-23 at 11.25.14 |  Screen Shot 2016-03-23 at 11.42.09 |  Screen Shot 2016-03-23 at 11.43.44 |
|---|---|---|
 |

Week 5 + Half-Term - A bumpy road

In order for my work to look more realistic I've decided to bump map all of my textures. In order to get a good bump map I first had to create a base for the bumps. To do this I first desaturated an image in photoshop and then I've manipulated the ''curves'' of the image in order to make the white and black colours stand out more. I've learned that maya treats a dark colour as an indentation and it makes the whiter colours stand out from the texture.
I've applied this technique to every texture that I've created so far whilst making sure that all of my bump depth values were not too large as that would ruin the realism of my textures.

 Screen Shot 2016-04-11 at 09.26.02 |  Screen Shot 2016-04-11 at 09.26.09 |  Screen Shot 2016-04-11 at 09.51.11 |
|---|
I thought that my truck was looking very bare and so I've decided to model some armor plating onto the truck that would be secured on by nails.
I began by simply modelling a thin rectangle but then I've manipulated its vertices to create a 'broken' jagged look to them in order to imply that they were a part of something else before being used as plating. I've repeated this process two more times to create three different plates. I then placed them around the front portion of the truck and began to model my screw.
To model my screw I've used the ''create helix'' tool as I needed the bottom section fo the screw to have a spiral. After completing the screw I've duplicated and placed it around the plates however it did not look natural to me and so I've manipulated the vertices of every screw to make them look bent and used since brand new screws would be hard to come by in the mad max universe.

 Screen Shot 2016-04-11 at 09.52.28 |  Screen Shot 2016-04-11 at 09.52.55 |  Screen Shot 2016-04-11 at 10.27.09 |
|---|
 Screen Shot 2016-04-11 at 10.39.53 |  Screen Shot 2016-04-11 at 10.56.39 |  Screen Shot 2016-04-11 at 10.58.57 |
|---|
 Screen Shot 2016-04-11 at 11.08.01 |  Screen Shot 2016-04-11 at 11.47.55 |
|---|

At this point we were presenting our work so far to the whole class. I would say that most of the people understood the direction I want to take this project in and were fully informed as to what it took to get this far. The major improvement suggested to me was making the front body of the car lighter to bring out the texture and surrounding polygons more. I've taken this into consideration ad I've brightened the texture that I've used in photoshop, I will also remember this critique for the future.

To continue basing my model off the mock-up that I've created I decided to start creating the seat and the engine. In order to make the engine I first needed to study some engines online but since most of the shapes were very intricate and complicated I decided to create a basic shape that somewhat resembled an engine.
To begin I modelled a slightly warped 'T' shape. I then began creating various cylinders that would be connected to the main body as well as using extrude to create a 'belt' that would connect two cylinders at the front.
I created some tubes that would be placed at the top of the tank in order to make it look more intricate and I've used booleans to create some holes at the front of the engine. Overall I think thawt the engine looked genuine enough if not looked at for too long.
I've textured it using maya_x_material textures that had bump maps assigned to them to give it more realism. I then placed the engine on the front of the truck however It looked out of place when it was there on its own and so I created two thing plates that made it look like the engine was sticking out of the hood instead of just being placed on the top of it.
 Screen Shot 2016-04-12 at 10.46.31 |  Screen Shot 2016-04-12 at 10.49.30 |  Screen Shot 2016-04-12 at 11.01.12 |
|---|
 Screen Shot 2016-04-12 at 11.08.46 |  Screen Shot 2016-04-12 at 11.12.30 |  Screen Shot 2016-04-12 at 11.27.38 |
|---|
 Screen Shot 2016-04-12 at 11.34.41 |  Screen Shot 2016-04-12 at 11.59.01 |  Screen Shot 2016-04-12 at 13.36.50 |
|---|
As mentioned previously I've also modelled a chair for the driver along with the engine. To model the chair I first had to create the shape of the chair and so I've began to map out the shape by simply adding new vertices to the multi-cut tool and then manipulating them following a stencil of the side of a car seat.
After completing the shape I've extruded it outwards to make it three-dimensional. I've noticed that the seat has a cushion at the fron that is slightly longer than the chair and so I've modelled that and placed it in the middle of the chair. I then textured the chair with a leather texture but I've made sure that the texture itself is of worn-out leather and not clean new leather as that would be un-true to the mad max universe.
The chair looked pretty bare on its own and so I've decided to add some 'bracing' to the seat whilst also making it look like a throne seeing as the characters in mad max are usually very self-entitled. Creating the braces was a very simple task that consisted of creating cubes and extruding outwards from them but it has given the seat more volume which is what I aimed for.
Lastly, to add realism I've decided to add some 'suspension' to the chair by creating dfour different cylinders surrounded by helixes that would be screwed into the chair and the main body of the truck. I've also re-used the plating that I've created earlier and I've placed it under the seat to create a better sense of stability.

 Screen Shot 2016-04-11 at 13.32.21 |  Screen Shot 2016-04-11 at 13.39.28 |  Screen Shot 2016-04-11 at 13.42.58 |
|---|
 Screen Shot 2016-04-11 at 13.44.29 |  Screen Shot 2016-04-11 at 13.48.15 |  Screen Shot 2016-04-11 at 13.49.19 |
|---|
 Screen Shot 2016-04-11 at 14.09.06 |  Screen Shot 2016-04-11 at 14.10.42 |  Screen Shot 2016-04-11 at 14.28.05 |
|---|
 Screen Shot 2016-04-11 at 14.35.16 |  Screen Shot 2016-04-11 at 14.35.19 |  Screen Shot 2016-04-11 at 14.38.48 |
|---|

I've realised that a steering wheel is missing from my truck and so I've decided to model one. Modelling the steering wheel was the easiest out of every model so far seeing as I did not want to put too much detail into it.
I've used the 'create ring' tool to create the outer sectiuon and then I've extruded the inner section to create yet another T-shape. To add some design to the wheel I've used boolean to create holes within the stering wheel.
Lastly I've textured both the wheel and the inner section with a leather and metal texture respectively. I created a cylinder to connect the wheel to the main body to give the illusion that the wheel does in fact control the wheels of the vehicle.

This is the worn-leather texture I've used for both the chair and the wheel.
 Screen Shot 2016-04-11 at 14.52.29 |  Screen Shot 2016-04-11 at 14.54.32 |  Screen Shot 2016-04-11 at 15.08.08 |
|---|
Week 6 - Tanking it up
 Screen Shot 2016-04-12 at 09.38.19 |  Screen Shot 2016-04-12 at 09.38.23 |  Screen Shot 2016-04-12 at 09.51.24 |
|---|---|---|
 Screen Shot 2016-04-12 at 09.48.09 |
Before I began to do what I wanted to this week I first had to create a better model for the two cylinders at the back of the truck. I've also used the armor plating to connect the truck to the two cylinders rather than having the chain directly connected to both.
I've decided that the back section of the truck did not really fit in to the design and so I've removed it and made the cylinders bigger however that made the wheels look silly as they were already pretty large and so I've chosen to opt-in for tank tracks instead. I'm basing the tank tracs on one of my research pictures. To begin I first created two rectangular shapes with a square design to them, I've used extrude and booleans to achieve their shape. Originally I planned to texture them just as I've textured everything else in my project however I've come to realise that texturing every single piece would make the render time of the project much longer and so I've opted to using a colour instead of a texture. I then duplicated the two track pieces whilst slightly altering their path to follow a track shape. I've created the two different cylinder shapes which I then duplicated and placed according to how rotational cylinders are usually placed within tracks. I tried to create a back plating to hold up the tracks seeing as a proffesional way to mount them onto the vehicle would not be easy to achieve in the mad max universe

 ss+(2016-04-14+at+01.41.16) |  ss+(2016-04-14+at+01.42.57) | ss+(2016-04-14+at+01.46.01) |
|---|---|---|
 ss+(2016-04-16+at+01.13.00) |
 Screen Shot 2016-04-18 at 09.19.18 |  Screen Shot 2016-04-18 at 10.25.36 |  Screen Shot 2016-04-18 at 10.40.58 |
|---|
 Screen Shot 2016-04-18 at 11.04.07 |  Screen Shot 2016-04-18 at 11.17.29 |  Screen Shot 2016-04-18 at 11.56.33 |
|---|
 Screen Shot 2016-04-18 at 14.02.23 |  Screen Shot 2016-04-19 at 09.23.19 |  Screen Shot 2016-04-19 at 09.56.52 |
|---|
 Screen Shot 2016-04-19 at 10.40.57 |  Screen Shot 2016-04-19 at 11.12.17 |  Screen Shot 2016-04-20 at 09.10.10 |
|---|
I tried to experiment by using cogs to make the tracks look more intricate however it made the rendering time very long and so ultimately I've had to give up on the idea.
Below Is a 3D model of the final model for the truck.
 Screen Shot 2016-04-20 at 10.32.47 |  Screen Shot 2016-04-20 at 10.59.17 |  |
|---|
In the meanwhile I've created a gas cylinder that I wanted to put on the truck to add more realism, I modelled it by simply extruding a shape whilst following a stencil in the background. I ended up using the gas cylinder later on in the project by putting it on the buggy model.
Week 7 - Buggy problem
At this point I've began to question the final outcome that I want to achieve with this project. At first I thought that I would only have enough time to create one model and then try to visualise it within another photograph similarly to Unit 6 however I've come to the conclusion that I have more time and so I decided to model more and then instead of visualising the models I want to tell some sort of a story.
To begin, I've decided to create a second vehicle that would be fighting the truck that I modelled earlier. I began by modelling a simple shape for the vehicle, I decided to base the shape off a buggy-style vehicle. I decided that this vehicle would look much more cheaply made compared to the truck and so I decided that instead of creating a main body the vehicle itself would be made out of many plates similar to that of the armor plating on the truck. I've also created new wheels as I did not think that the spiky wheels would fir the buggy. I made these wheels look a lot more used than the wheels of the truck to once again make the buggy look more cheaply made. I duplicated the same seat and wheel that I made for the truck and I placed it where I believe the driver of the buggy would sit. I modelled the back wheels to be at an angle as most buggies are created that way with suspension also present near the back wheels. I used the same engine I created earlier and I placed it at the back of the buggy, then I used the propane I created earlier and I connected it to the engine. As this vehicle looks a lot weaker than the truck I decided that it would be in the process of being rammed by the truck. I placed the buggy sideways to the truck and then I moved some of the plating around to simulate damage within the area where the truck's bumper would have hit.
Below I've presented two 3D models of the buggy, one broken an one that is not.

 Screen Shot 2016-04-25 at 09.28.15 |  Screen Shot 2016-04-25 at 09.52.04 |  Screen Shot 2016-04-25 at 13.49.58 |
|---|
 Screen Shot 2016-04-25 at 13.50.00 |  Screen Shot 2016-04-25 at 14.34.17 |  Screen Shot 2016-04-25 at 14.40.55 |
|---|
 Screen Shot 2016-04-26 at 09.06.10 |  Screen Shot 2016-04-26 at 09.53.43 |  Screen Shot 2016-04-26 at 10.06.54 |
|---|
 Screen Shot 2016-04-26 at 11.43.21 |  Screen Shot 2016-04-26 at 11.43.24 |
|---|
 Screen Shot 2016-04-26 at 12.01.12 |  Screen Shot 2016-04-26 at 12.07.36 |
|---|
Week 8 - Creating a scene

I've decided to create a scene where the truck model is ramming one of the buggies however what the driver did not know is that it was all a setup created to lure him into a trap. To represent this I've duplicated three buggy models of the same kind as the one that is being rammed, to signify that they're connected, and I've placed them behind the truck as if they are chasing it. I've also created a watchtower from which from a laser can be seen representing the fact that someone is aiming a sniper rifle at the driver of the truck
To make the scene believeable I've created a large plane with a sand texture around it and I've used a hdr of a sandy area to create an image-based lighting enviroment around my scene. I've also created a lot of miscellaneous metal debris around the area to fill all of the surrounding space and to give off a feeling of a barren, destroyed wasteland.
 |  |  |
|---|

Overall I was happy with how my project was recieved. Some of the feedback that I've recieved is to make the story of the scene easier to understand. Another piece of feedback that I've recieved is that I should start looking into how I want to present my work and how my final major will look in the end.
Going along the lines of thinking of how my project is going to be presented I looked into various ways stories are presented via single scenes. Some of the methods are comics, a freeze frame fly-by of a scene and full on stop-motion.
I've decided to focus on the second method which is the freeze frame fly-by. I've looked into different media that has used this method and I've come across this video which shows a bank heist whilst also being one frozen scene that is presented by the movement of the camera.
I particularly enjoy how the beggining of the scene is linked with an ending and how the viewer leaves knowing more than they have when they started watching. The video also has a behind-the-scenes look into how the video was made.
Week 9 - A comic approach
I was having trouble getting the camera to demonstrate the story in the way that I wanted it to and so I needed a new way of telling the story.
I've looked into how to tell a story using a comic book and I've come across the opening of an old TV show called ''Grange Hill'', the opening to the show has the camera pan from one comic panel to another and some of the panels are animated.
I've chosen that this is the way I want to show my story and that I will make the panels animated incorporating both the frozen heist and the comic opening into my work.
Below I've looked into finding a suitable comic page and then removing all of the art from it. I've also creates small panels that hint at the story of each panel. I've used a font that resembles the sme font used in comic books.


This is the storyboard that shows what I want each panel to be. The red lines represent the way I want the camera to move whilst presenting the scene.
 |  |  |
|---|---|---|
 |  |
These are the five different scenes that I want to show and animate within the comic. I've modelled a whole new scene for the fourth panel however it is a very simple scene that just shows off a badly drawn map of the area. It is there to show that the scene was staged
 |  |
|---|
To make the comic book more comic-style I've created these exclamations that are usually present within comics. I've also looked into photoshop filters to see if there is any way to make it seem as if it was printed on paper. Below is my attempt at making a still comic page that used the renders of my work. I will also attempt to animate each scene and have the camera pan from each panel.

Using the camera and batch render I've rendered five different scenes by moving the camera around and setting keyframes in between movements.
The video shown here is all the 5 scenes played back to back.
This was my first attempt at making the animated comic scene. It did not end up looking well and many of the scenes look very choppy mostly due to my inexperience with the editing software that I've used.
To not repeat the same mistake that I've made when making the previous version I've decided to first create the animated comic and then have the camera pan once the comic is finished.
I've used photoshop to animate each frame with around 3 seconds in between each scene playing to allow time for the camera to pan from scene to scene.
The result of just playing each scene can be seen on the left.
This was the result of my attempt at panning from scene to scene and zooming out to show the rest of the page in-between. It resulted in a much more smoother looking animation compared to my first try however I believe that I made the camera zoom out too much in-between the transition from panel to panel and so I will attempt to make the transitions smaller and smoother.
Evaluation:
It has finally come down to the evaluation. This whole project was an eye-opening experience that has taught me a lot on time management and overall how to combine several ideas to create a single project. This project originally began as a simple product visualisation of a mad max inspired vehicle but it has evolved into a much bigger outcome than I could have hoped for. I am happy with how the final project came out and even though I can see several ways it could be improved I still believe that the project projected a portion of what I had envisioned at the beginning when first writing out my statement of intent.
I’ve come to the conclusion that sometimes I may not believe in my abilities and that could be the reason as to why I’ve set a lower target for myself than I achieved however it could be because over time I’ve become better at modelling and it has pushed me to achieve more than I already have. Even though I’ve come so far I still see many mistakes in my work, even now I could have improved the truck by adding more rough details to it such as making the front body not be one big shape or by still somehow incorporating the back design of my original mock-up instead of opting out for an easier route by modelling tank tracks and removing the back portion completely.
I believe that the research I’ve done inspired my work a lot, in fact, without the research my work would be completely different and therefore I owe my inspiration to it. I’ve used a lot of the mad max universe to influence my models from the rusty metal to the overall shoddy look to the vehicles to even the sandy surrounding area however I feel that I have not used my other source, Twisted Metal, nearly enough and if I had the chance I would use it to implement elements from twisted metal such as vehicle-mounted weaponry to add to my models or maybe influencing the story similarly to how the story of twisted metal I presented. Further on I’ve researched different media and how I could use it to present my story. I believe that I’ve done a good job of combining the idea of the freeze frame fly-by with an animated comic well but If I had the chance to improve my work I would try to incorporate another style of video into my work to make it even more unique, possibly using a green screen to insert myself into the renders. The idea of visualising my truck model was dropped halfway through the project and even though it did not show off all of the work that I’ve created if I had the time to I would still attempt to create a visualisation of the model in a standard car part to create a niche contrast between the universe of mad max and the real world.
Along the way I’ve learned how to use a lot of new software such as Adobe After Effects and Sony Vegas to edit my videos but I’ve also learned some new features of old software that I’ve used such as Adobe Photoshop which I’ve learned that it can edit videos almost to the same strength as it can edit images. If I were to improve some of the video work it would definitely be the camera work present in my final outcome. I can still see that some of the transitions are sloppy and could use much more refining such as smoothing out the zoom-in and zoom-out from each panel. I could have also attempted to make the videos look like a comic book similar to the still version of my final outcome as that would have increased the connection between my work and the research that I’ve done. There is also no sound present in my work which could be a major downfall for the final outcome as sound is as important as video when it comes to creating a successful movie as seen in the frozen heist video where the audio is always present even when the whole scene itself is frozen. Some of the sounds they used were slowed down noises that would be present in the scene such as a faint sound of a slowed down sound of a police siren or gunshots. I could have done the same within my project by possibly using a sound of an engine or the sound of crashing metal. This would make my work much more appealing in more than just the visual department.
I believe that I’ve managed my time well throughout the course of the project and in return I’ve had a lot of time to improve areas I would have otherwise not been able to. Managing my time well was what allowed me to further develop my project and branch-out from the idea of just visualising and produce a much bigger outcome. The evidence of my organising can be seen by the fact that I’ve arranged my work into weeks creating somewhat of a diary/blog.
If I were to improve the renders I would definitely change the lighting in panel 4, its is very hard to make out what I was trying to portray within the panel and that results in me having to explain what my intentions were. Another mistake that I’ve made is that some of the lighting in the panels is inconsistent, for example halfway through panel 5 the colour of the sand slightly changes off-putting the whole scene.
In the end I believe that this project resulted in some significant changes in my outlook and quality but most importantly I was able to produce a final outcome that I am proud of presenting and I believe that my website shows evidence of my process notes and my thoughts on each step.
Post-Formative Evaluation:
Some of the feedback that I've recieved mentioned that the renders of my work are too fast and that because of how fast they are the detail that I wanted to show was difficult to see. I've re-edited the renders to make them longer and to do so I've used the time-stretch setting and the frame-blending setting in Adobe After Effects however even though it has slowed down my work and made it look more cinematic it has also made some of the frames look off and distorted, this is because it is the result of the frame blending tool and the tool itself cannot sometimes blend the frames perfectly. Additionally the last panel of my work had a lighting change in the middle of the renders and that distorted the frame blending much more. To counteract the frame blending problem I've tried to use one of the filters present on after effects. As I've already had a comic theme going along with my work I've decided to use the cartoon filter and simulate the look of my still comic.
The final product of this exercise is not as great as I would have imagined it to be, at best it is on par with my original final outcome. A lot could have been done to make this project better however as I've come to the end of the year I do not have any more time to re-render scenes to be longer and so I have to depend on tools such as frame blending with all of their dis-advantages in mind.